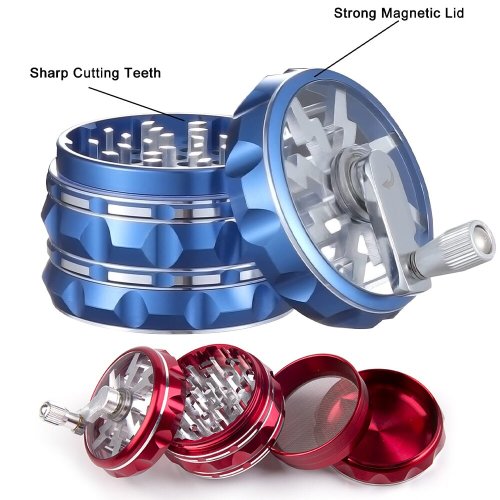
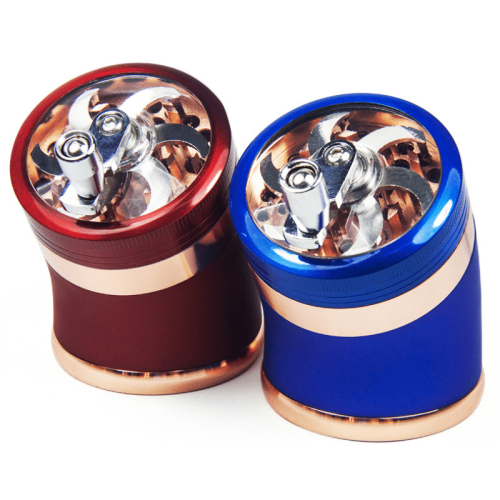
As a fellow cannabis lover, I feel ya – keeping your grinder clean is so important for an optimal smoking experience. Let me walk you through the process in a fun, friendly way. After a while, all that sticky icky residue and trichomes can really build up in your grinder, making it less effective and your grind less fresh. No bueno! Fortunately, cleaning it out is super easy. Just take your grinder apart and grab some isopropyl alcohol and a soft bristle brush – standard supplies for any prepared stoner ! Soak all the pieces in the alcohol so it can dissolve away all that built-up gunk. Use your brush to gently scrub every nook and cranny. Now let’s take a closer look

Why Cleaning Your Weed Grinder Is Important
Keeping your weed grinder super clean on the regular is clutch for more than just making sure it runs smooth. It also helps keep your herbs tasty and strong! When your grinder gets grimy, it can lead to some not-so-chill issues.
First up, all that sticky residue building up will make it way harder to grind your bud evenly. Not ideal when you’re trying to get your vape or smoke sesh started. Nasty buildup can also change the flavor and smell of future grinds, making your herbs less mouthwatering.
Here’s the real bummer – letting your grinder get too dirty causes you to lose out on precious trichomes, my dude! Those are the crystal resin glands that contain the cannabinoids and terpenes that make weed so potent and aromatic. What a waste!
And since those sharp teeth shred through sticky bud so fast, gunk builds up quick if you don’t stay on top of cleaning. Resin buildup makes it tougher for your grinder to pulverize bud evenly
Lastly, mold can start growing on all that leftover stickiness if you let it fester too long. Inhaling mold spores is mega bad news and can cause respiratory issues and allergies. I have encountered this situation before, so I clean my grinder regularly now.

Step-By-Step Guide To Cleaning Your Weed Grinder
Next, let’s thoroughly clean your cannabis grinder,Kicking things off, delicately take that grinder apart piece by piece. Pop off the top lid, then remove the grinding chamber, screens, kief catcher – all of it. Use your hands or a little tool if needed.
Next up, it’s time to scrape away any leftover sticky herb still clinging to the grinder. Use a small brush or toothbrush to gently scrub every nook and cranny. Make sure to get rid of all leftover material so it doesn’t gunk things up later.
Now for the fun part – drop all the grinder pieces into a container filled with isopropyl alcohol and let them soak for 30 minutes. This’ll loosen up even the most stubborn resin.
Once they’ve soaked, grab your brush and scrub each component clean. I’m talking sparkling clean. Then rinse everything with warm water to remove any leftover alcohol residue.
At this point your grinder parts should be looking shiny and brand new! But keep in mind the steps above are for metal grinders specifically. If you’ve got a plastic, wooden or acrylic grinder, the cleaning process will be a bit different. We can chat about the best ways to clean other grinder materials too if you need

Considerations for Different Materials:
how to clean a wooden weed grinder
Cleaning a wooden weed grinder requires a bit of a different approach than metal ones. You’ll wanna use warm soapy water instead of isopropyl alcohol to avoid damaging the wood.
Start by removing the teeth – use a flathead screwdriver or coin to gently pry them out. Then grab a soft brush or sponge and give the outside of the grinder a thorough scrub in that warm soapy water. This will lift away any sticky residue or dirt.
The key difference is skipping the alcohol soak, since that can be harmful to wood over time. Just stick to the soapy wash. Then rinse very thoroughly with plain water and let the grinder dry completely before reassembling. This helps preserve the life of your wooden piece.
Once it’s dry, I recommend applying some beeswax or carnauba wax to protect and polish the wood. Your grinder will look shiny and new! Store it away until next sesh.

How to clean plastic weed grinder
Now let’s clean the plastic smoke grinder,First up, grab some cleaning supplies – rubbing alcohol, some olive or coconut oil (make sure it’s food-grade!), and a few paper towels.
Now, in a small bowl, mix together a teaspoon of the oil with a couple drops of rubbing alcohol. Give it a good stir until well combined. This mixture will help loosen up any sticky residue and prevent rust on the metal parts.
Once you’ve taken your grinder apart, go ahead and generously apply the oil mixture to all the pieces – don’t be shy now! Use a brush to really work it into all the nooks and crannies, especially along the sides and teeth where gunk loves to hide. The oil will cut through it in a jiffy.
Wipe it all down with the paper towels et voila! A squeaky clean grinder ready for its next use. See, that wasn’t so bad. A little elbow grease and this simple cleaning hack will keep your grinder looking fresh every time.

Common Mistakes To Avoid While Cleaning Your Weed Grinder
Cleaning your cannabis grinder doesn’t have to be a drag! When it comes time to give your grinder some TLC, steer clear of harsh cleaners – they can be too rough on the delicate parts inside. Opt for gentler solutions like isopropyl alcohol or warm, soapy water instead.
Once you’ve given your grinder a good scrub, be sure to let it dry completely before putting it back together. Leaving any moisture behind can cause rust, which shortens your grinder’s lifespan. I recommend setting the pieces out on a towel for a few hours just to be safe.
Before reassembling, take a minute to double check that each part is squeaky clean and bone dry. This little step goes a long way in keeping your grinder running smoothly for years to come. Consistent care keeps your grinder happy!


Add comment
You must be logged in to post a comment.